Continued from Part 3.
I had my final design drawn up on SketchUp. I liked it much better as the size increased when you walked through east to west rather than it being too symmetrical. There was also space for people sitting that would allow one to look out on the views up and down the river Tay towards the bridges.

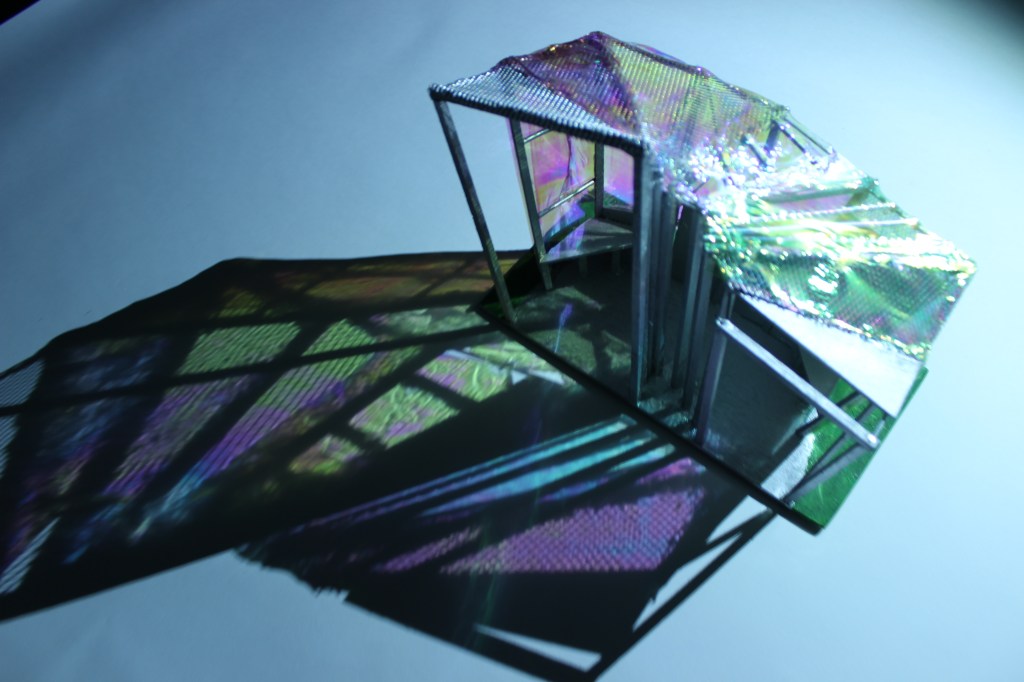
It was now time to start work on my final 1/20 scale model. I made the main frame out of balsa wood onto a wooden base then secured it between each frame with wire. Then I attached panels and mesh to create patterns when light was shone upon it. Finally I applied fusable film with a heat gun in different colours to represent ETFE.


That was my scale model completed and it was really effective when light was shone through from different angles.


I also set to work on my contextulaised images to see how the final pavilion design would look in in its location down beside the rail bridge.


Leave a comment